

Install
apps extra pulls in Prefab, the Python component library used to build app UIs.
Write the tool
Createserver.py. The interesting parts: app=True tells FastMCP this tool renders a UI, and with PrefabApp() as app: is the canonical pattern for composing one.
server.py
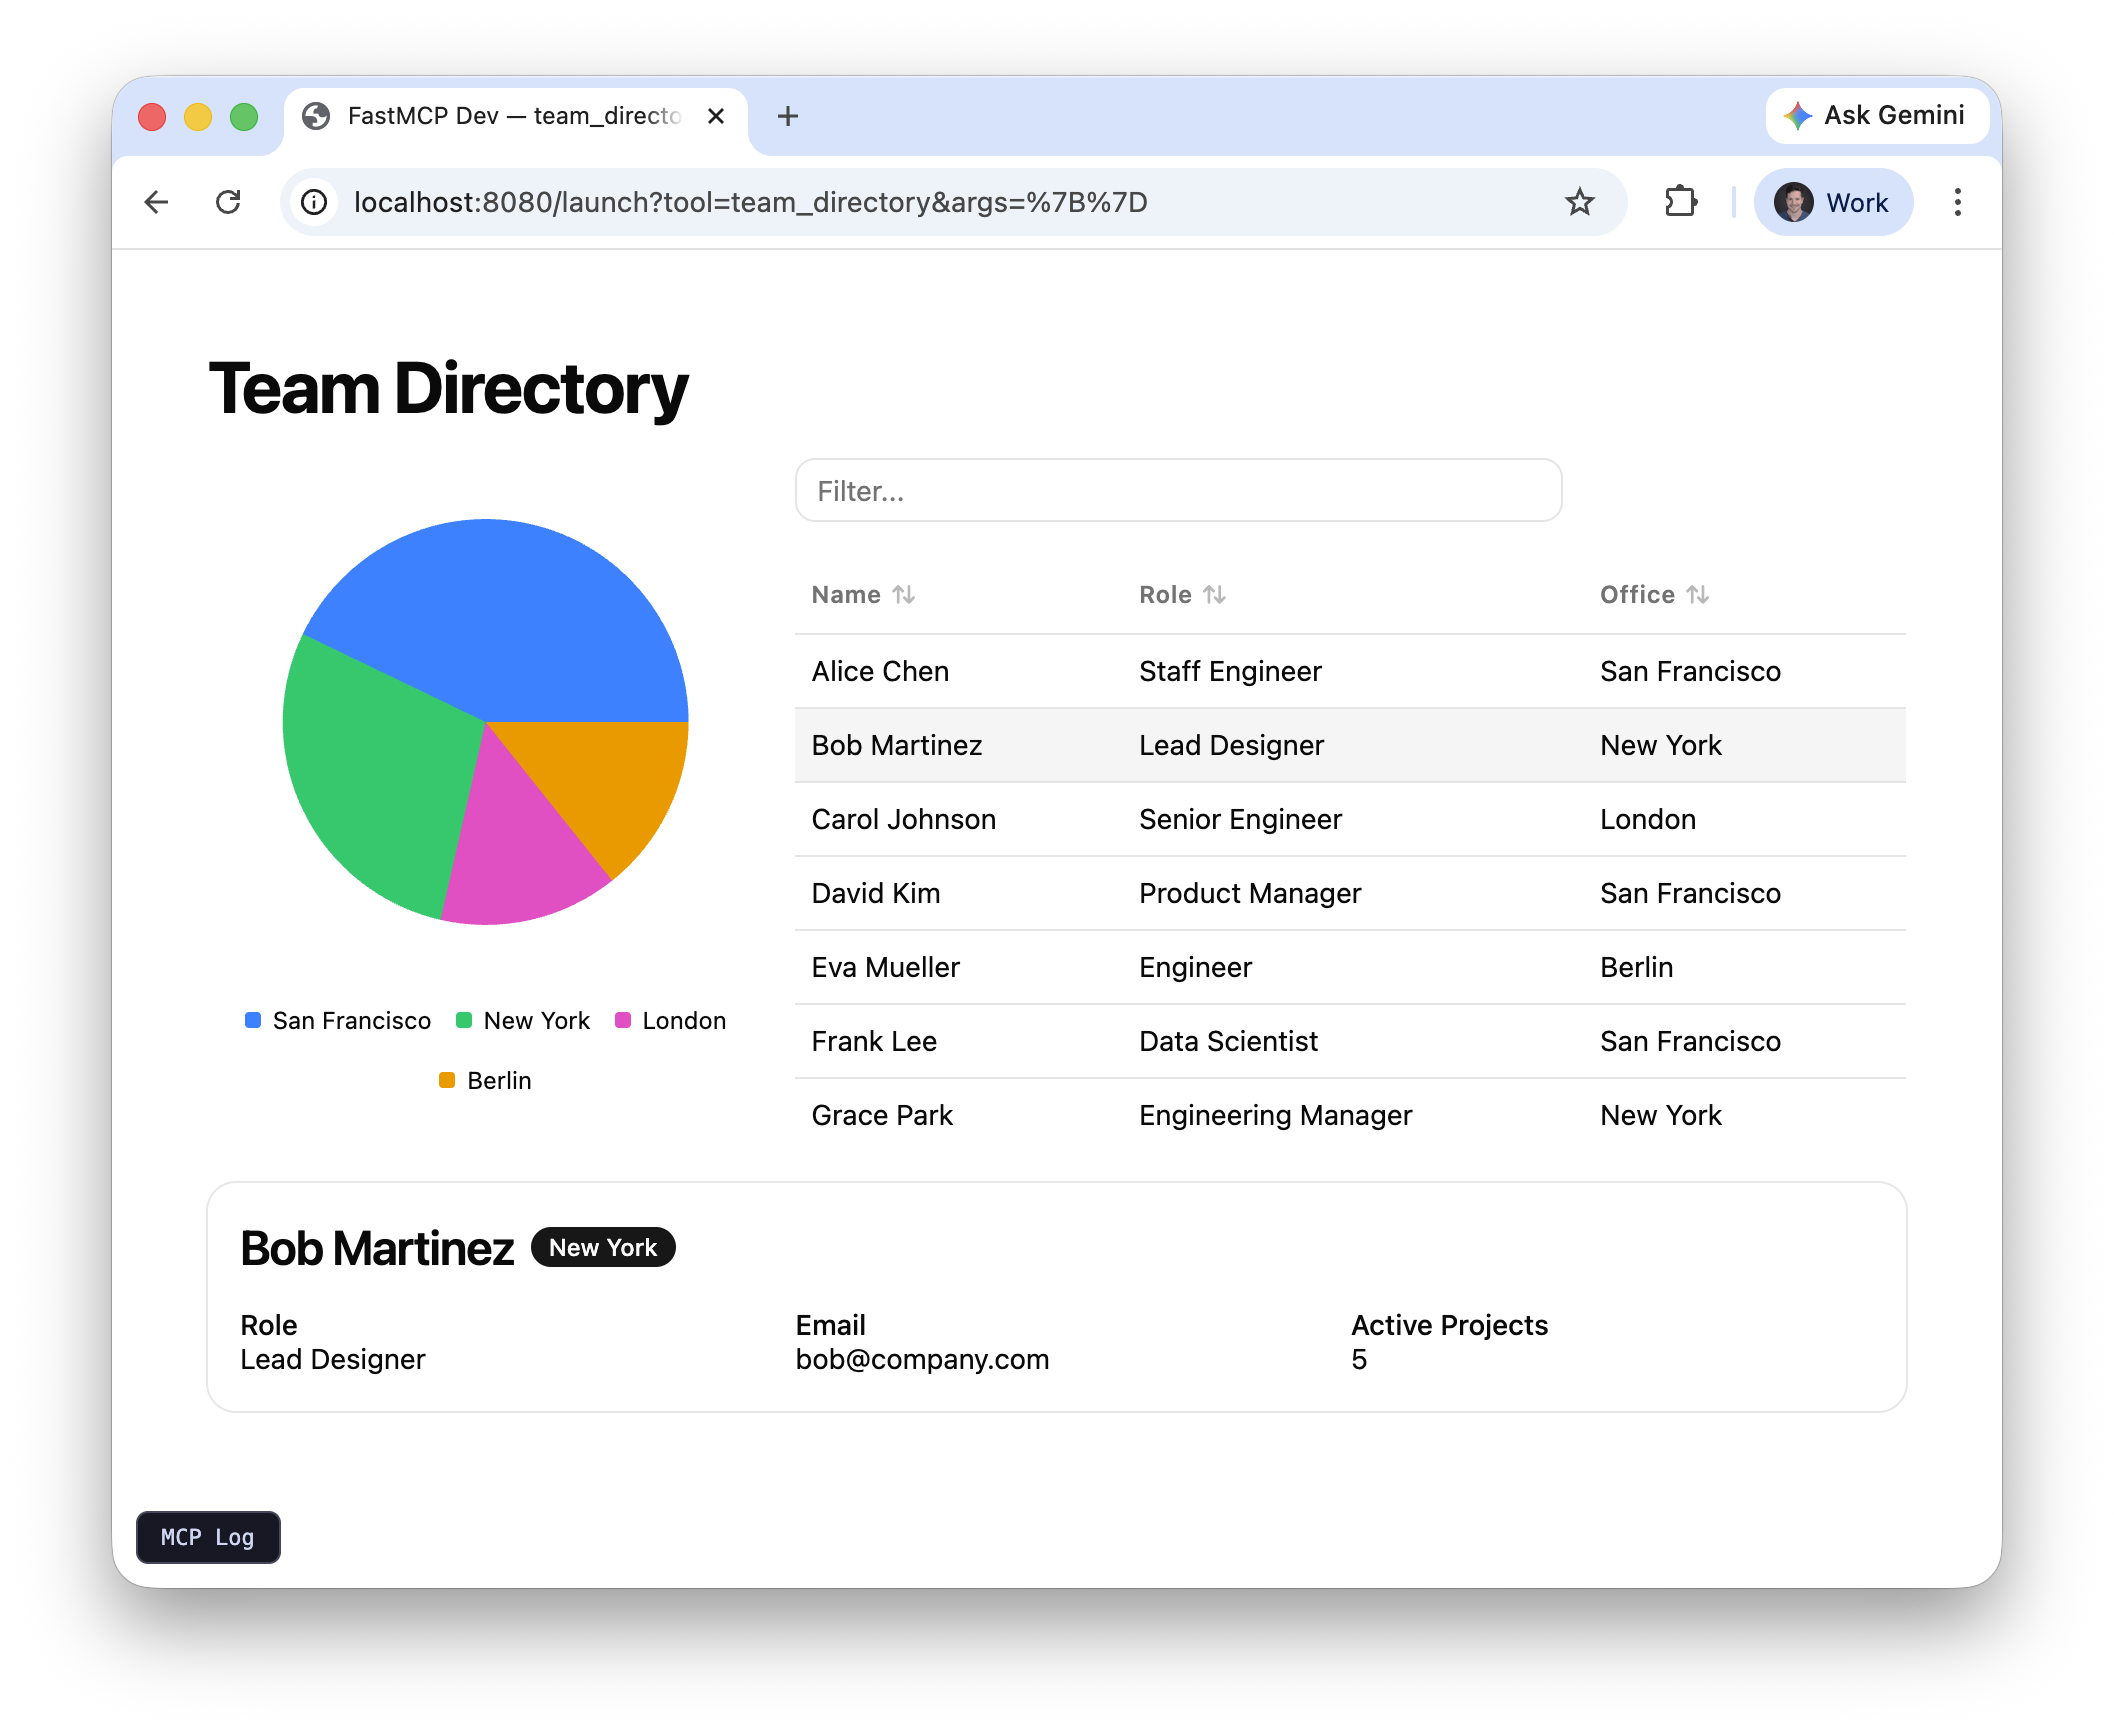
PrefabApp() is the root; everything inside its with block becomes the UI. Column stacks children vertically, Grid lays them out in columns. DataTable takes rows and column definitions and gives you sort and search for free.
app=True does the rest: it sets up the renderer resource, the content security policy, and the metadata that tells the host “this tool returns a UI.” The host loads the result in a sandboxed iframe where the user can interact with it — all client-side, no round-trips.
Preview it
FastMCP ships a dev server that renders your app tools in a browser, no MCP host needed:http://localhost:8080, pick team_directory, and try sorting columns and searching.
Make it reactive
The UI above renders once from your Python. Prefab apps can also respond to user input live, without any server round-trips. The key concept is state: a client-side key-value store that components read from and write to. Click a row in the demo below to see a detail card appear: Add a few imports, give each member a couple more fields, wire up a click handler, and render a detail card when something’s selected:server.py
on_row_click=SetState("selected", Rx("$event"))— clicking a row writes its data into theselectedstate key.$eventis the clicked row dict.Rx("selected.name")— a reactive reference. It doesn’t hold a Python value; it compiles to a browser-side expression that re-evaluates wheneverselectedchanges, soText(Rx("selected.name"))always shows the latest clicked name.If(STATE.selected)— conditionally renders its body. Before any click,selectedisNoneand the card stays hidden.
state={"selected": None} dict on PrefabApp sets the initial value. Everything else happens in the browser — no round-trips to your server when the user clicks.
Where to go next
You’ve built a tool that returns an interactive, reactive UI. This pattern covers a huge range of use cases: build a visualization, return it, and the user gets it rendered right in the conversation.- Interactive Tools — charts, tables, dashboards, reactive state, with live demos
- FastMCPApp — when the UI needs to call back to your server (forms, search, CRUD)
- Examples — complete working servers you can run today