

2.13.0
This guide shows you how to secure your FastMCP server using OCI IAM OAuth. Since OCI IAM doesn’t support Dynamic Client Registration, this integration uses the OIDC Proxy pattern to bridge OCI’s traditional OAuth with MCP’s authentication requirements.
Configuration
Prerequisites
- An OCI cloud Account with access to create an Integrated Application in an Identity Domain.
- Your FastMCP server’s URL (For dev environments, it is http://localhost:8000. For PROD environments, it could be https://mcp.yourdomain.com)
Step 1: Make sure client access is enabled for JWK’s URL
1
Navigate to OCI IAM Domain Settings
Login to OCI console (https://cloud.oracle.com for OCI commercial cloud).
From “Identity & Security” menu, open Domains page.
On the Domains list page, select the domain that you are using for MCP Authentication.
Open Settings tab.
Click on “Edit Domain Settings” button.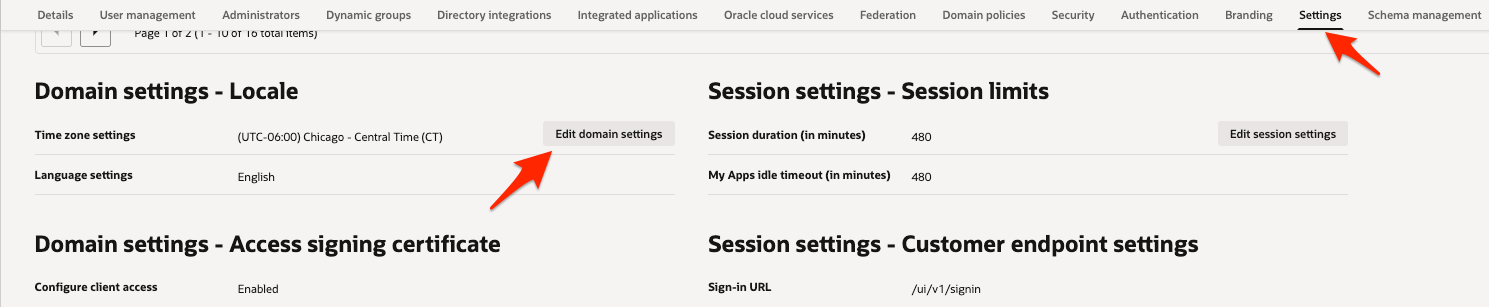
2
Update Domain Setting
Enable “Configure client access” checkbox as shown in the screenshot.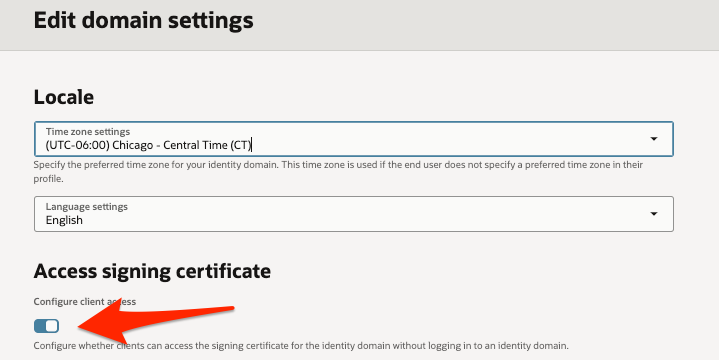
Step 2: Create OAuth client for MCP server authentication
Follow the Steps as mentioned below to create an OAuth client.1
Navigate to OCI IAM Integrated Applications
Login to OCI console (https://cloud.oracle.com for OCI commercial cloud).
From “Identity & Security” menu, open Domains page.
On the Domains list page, select the domain in which you want to create MCP server OAuth client. If you need help finding the list page for the domain, see Listing Identity Domains..
On the details page, select Integrated applications. A list of applications in the domain is displayed.
2
Add an Integrated Application
Select Add application.
In the Add application window, select Confidential Application.
Select Launch workflow.
In the Add application details page, Enter name and description as shown below.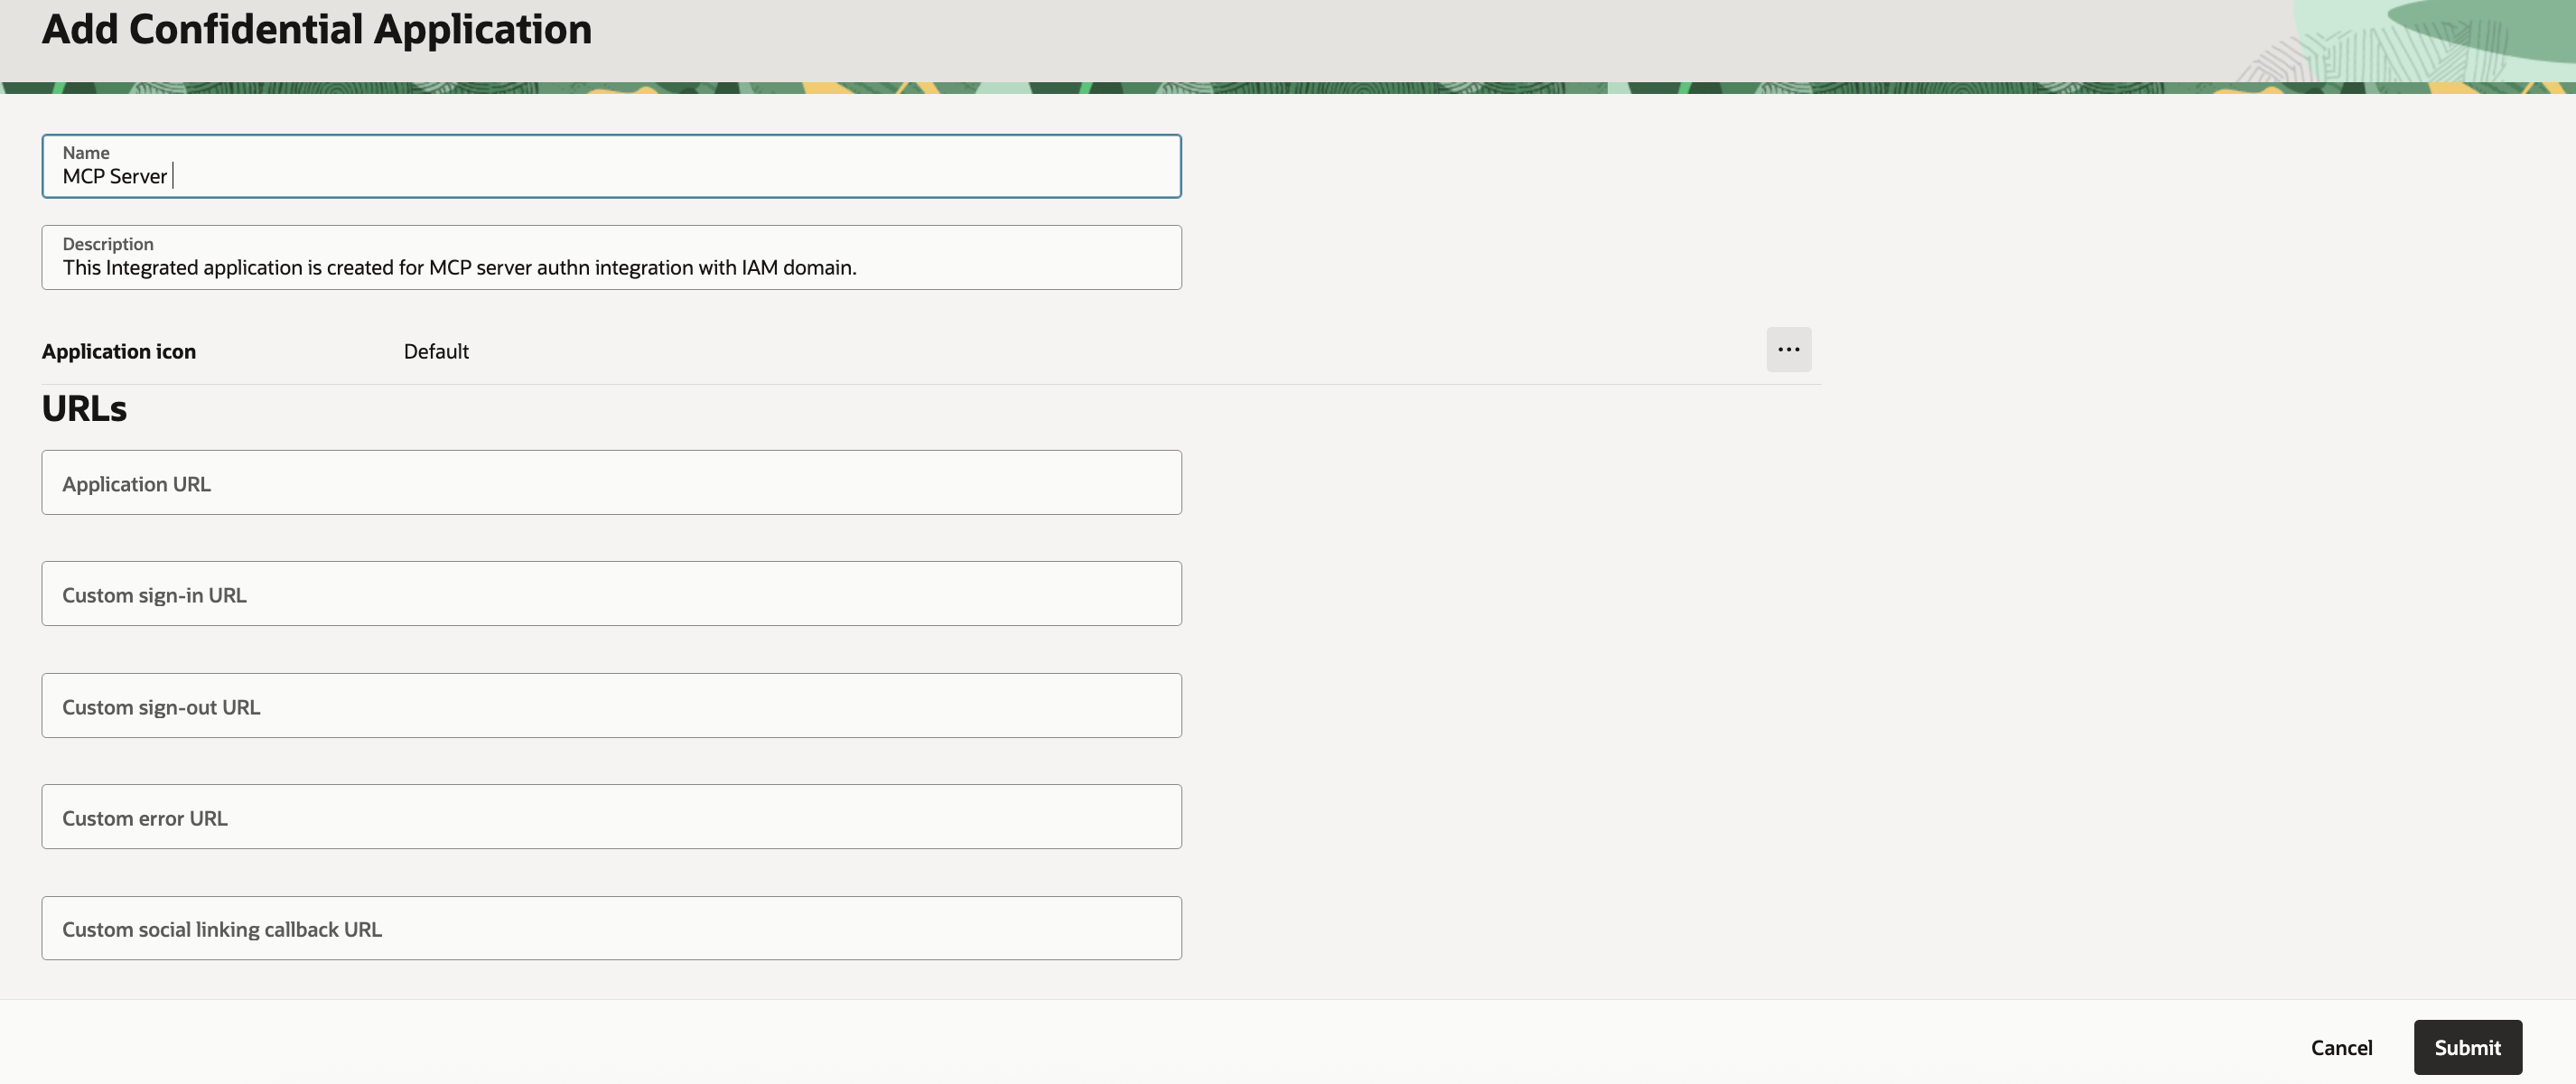
3
Update OAuth Configuration for an Integrated Application
Once the Integrated Application is created, Click on “OAuth configuration” tab.
Click on “Edit OAuth configuration” button.
Configure the application as OAuth client by selecting “Configure this application as a client now” radio button.
Select “Authorization code” grant type. If you are planning to use the same OAuth client application for token exchange, select “Client credentials” grant type as well. In the sample, we will use the same client.
For Authorization grant type, select redirect URL. In most cases, this will be the MCP server URL followed by “/oauth/callback”.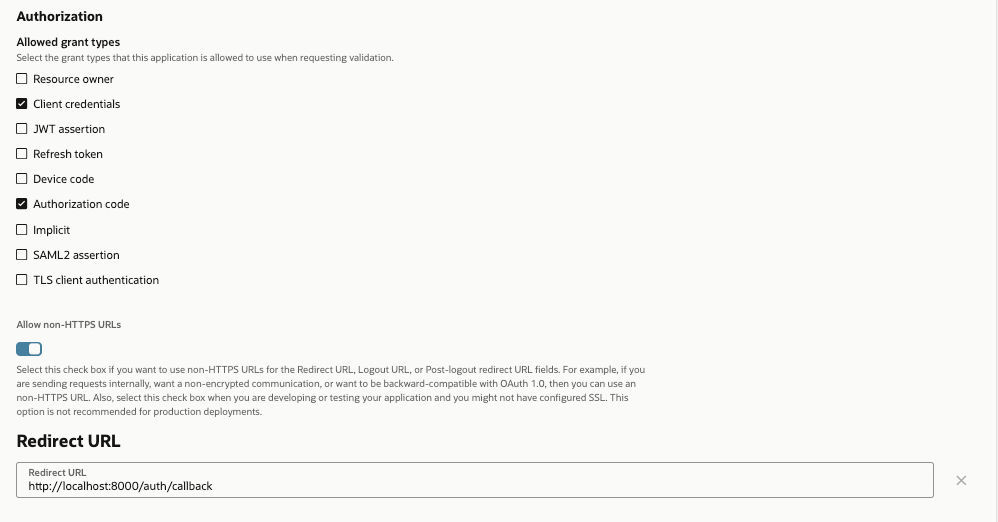
4
Activate the Integrated Application
Click on “Submit” button to update OAuth configuration for the client application.
Note: You don’t need to do any special configuration to support PKCE for the OAuth client.
Make sure to Activate the client application.
Note down client ID and client secret for the application. You’ll use these values when configuring the OCIProvider in your code.
Step 3: Token Exchange Setup (Only if MCP server needs to talk to OCI Control Plane)
Token exchange helps you exchange a logged-in user’s OCI IAM token for an OCI control plane session token, also known as UPST (User Principal Session Token). To learn more about token exchange, refer to my Workload Identity Federation Blog For token exchange, we need to configure Identity propagation trust. The blog above discusses setting up the trust using REST APIs. However, you can also use OCI CLI. Before using the CLI command below, ensure that you have created a token exchange OAuth client. In most cases, you can use the same OAuth client that you created above. Replace<IAM_GUID> and <CLIENT_ID> in the CLI command below with your actual values.
Running MCP server
Once the setup is complete, to run the MCP server, run the below command.client.py
- Your browser will open to OCI IAM’s login page
- Sign in with your OCI account and grant the requested consent
- After authorization, you’ll be redirected back to the redirect path
- The client receives the token and can make authenticated requests
Production Configuration
New in version2.13.0
For production deployments with persistent token management across server restarts, configure jwt_signing_key, and client_storage:
server.py
Parameters (
jwt_signing_key and client_storage) work together to ensure tokens and client registrations survive server restarts. Wrap your storage in FernetEncryptionWrapper to encrypt sensitive OAuth tokens at Rest - without it, tokens are stored in plaintext. Store secrets in environment variables and use a persistent storage backend like Redis for distributed deployments.For complete details on these parameters, see the OAuth Proxy documentation.The client caches tokens locally, so you won’t need to re-authenticate for subsequent runs unless the token expires or you explicitly clear the cache.